Showing posts with label baking. Show all posts

Thursday, 26 July 2012

Sweet as Sugar-Twice as nice!

So, I made a cake today...mainly because I didn't really want to work on my thesis.  (oops!) I just used a plain ol' chocolate cake box mix, but added a box of chocolate pudding to make it extra moist! To do this, just add the pudding mix to the cake mix, stir it together and then follow the directions on the box. I had to add a little bit of water (about 1/4 cup) extra to get it the normal consistency of a typical cake batter, but you don't have to do that.  Just be prepared it'll be a little thicker.

Okay...That little sucker is right out of the oven and I realise I don't have any frosting. I can handle that I think, I will just make some with powered sugar and milk.  Uh...CRISIS! We are currently out of BOTH powered sugar AND milk! EPIC fail as a house wife! What to do, what to do?!

We are on a no-spend week, so I didn't want to go out and spend money on those things (especially the powered sugar-total non-essential!) So I put on my thinking cap and it dawned on me I could make my own powered sugar!

I "googled" how to make powdered sugar and it was super-de-duper simple! You can check it out on Wikihow.  There are even photos...but I took some of my own! :)


1cup of sugar, 2tablespoons of corn starch, a blender and a little bit of patience. 


Ohhhh-aaahhhh, watch the smoke billow out! SUPER COOL!  I may or may not have done this a couple of times to see the sugar dust come out...leaning more towards the may. ha!

Anywho! Blend the sugar and corn starch up until it becomes the desired consistency.

So after I had the powered sugar, I needed to make he actual frosting.  Easy Vanilla Butter cream here I come! This super easy recipe is from Taste of Home.

However, I still had this tricky little issue of no milk.  But then I remembered we had Non-fat French Vanilla coffee creamer! WOO! That'll work!


Whip up your butter, whip it real good. And yes...I have a hand mixer and a stand mixer-don't judge me!

Add your powered sugar, coffee creamer (or milk) and a splash of vanilla.  Mix it all up and you've got yourself a nice easy-peasey frosting!


The Mister is lucky I need to wait until the cake is cool to frost that sucker...or else it'd be in my belly.


Tuesday, 15 May 2012

Quick Chocolate Fix

Okay, so I love chocolate. I'd like to say that I could live without it, but I know that would be a lie.  I like darker chocolate (around 70%) and the mister loves the hard stuff (90%-99%), he's hard core.

So I stumbled across Chocolate Covered Katie's blog and couldn't WAIT to try some of her recipes. The mister is a huge fan of Reese's Pieces (and peanut butter in general), so when I saw her Reese's Pieces Fudge Frosting, I knew I had to make it. You can find the recipe here.  It is delicious! Like, lick off the batter, the spatula, the bowl, your fingers good.

I did tweak it a little bit...I used chocolate milk and added a touch of powdered sugar.  I also used my little hand blender to mix it all together as I don't have a magic bullet and didn't feel like lugging out my blender!

So just measure out all the ingredients (start with 4tsp of maple syrup and add it one tsp at a time so it isn't too sweet).  Then whip it up!


 Within a few minutes you have a lovely frosting...make sure you taste it before you put away the blender and add more milk or syrup depending on the texture and sweetness you are going for!


So now that I had this lovely frosting, I needed something to put it on! I didn't want to make a whole cake so I decided to give her One-Minute Chocolate Cake a bash (check it out here) Oh heavens! for 45 seconds...THIS IS AMAZING. I put it on a pretty little plate (do make sure you let it cool before taking it out of the dish), put some of that delicious frosting on it and dug in! A perfect and simple chocolate dessert!


Sunday, 13 May 2012

Crusty Bread

I have a love of bread, any kind of bread, that might surpass my love of sweets.  I actually blame it on where I grew up because there was a bread factory on a major road we often drove down and the aroma wafting from the building was intoxicating.

I always look for bakery's and check to see what kind of breads they have to offer.  However, I usually (I have my moments of weakness though!) don't bring myself to pay $6 or more for a loaf of beautiful artisan bread. I've always had this idea that those delicious breads were so difficult to make until I found this recipe. My word, hold onto your hats because this is SO EASY! I found this recipe on Pinterest and followed it to Simply So Good.  You can find it here.

She gives fantastic step by step instructions, so I didn't bother to take too many photos as hers are great! I decided to try an olive and oregano loaf (ahhh-mazing!). This little guy is straight out of the oven: Hellloooo Dolly!


So, I didn't have sliced olives on hand, but I do have a handy dandy egg slicer (Thanks Mom!).  I use my egg slicer for anything that is soft (like an egg): mushrooms, olives, pickles, strawberries...you get the idea. It saves a lot of time and usually a bit of money, as pre-sliced things cost more. I put the olives through twice so the pieces would be a bit smaller.


I had to add a little bit (about 1/4 cup) more water (she calls for 1 1/2 cups).  I'm pretty sure it was because of the olives, but you want the dough to look like a sloppy mess. Cover that guy with plastic wrap and let sit overnight, this way you have a special treat for you when you wake up!

 I didn't take an after photo because I was too excited! It was HUGE! Oh the magic of fermentation!!!

Anyway, throw your pot in the oven: make sure to use an enamel covered cast iron pot.  Mine is one by Kitchenaid that I picked up last year when it was 50% off! But I'm sure you can find a great deal on them second hand because they can get pretty pricey. Just follow Simply So Good's directions and wait another hour your bread comes out and be prepared to be amazed.


I think tonight I'll make a chocolate chip and some sort of nut (toasted almond?)! Let me know if you try this bread and what you make!!

Thursday, 10 May 2012

Lemon and Strawberry Tart

So these past couple of weeks have been crazy busy!!  I've been finishing up exam papers and trying to re-organise our life *phew it's been tiring*! So sadly Lemony Love has been neglected, but I've been doing lovely treats and crafts the whole while! :)

Okay, so onto the fantastic Lemon and Strawberry tart I made last night! I've been in the mood for something that isn't chocolate (I think  I might be sick) and decided to give this little treat a try!

I found the recipe on Pillsbury's site.  It was pretty simple, but make sure you have everything ready to go because you can't leave the sugar/flour/cornstarch slurry alone (or else it will burn!)

So first, mix your sugar/flour/cornstarch in the sauce pan and have your water on hand.  Use cold water, adding it slowly, as it ensures your mixture won't clump.  Cornstarch is a little bugger for that! Bring the mix to a boil, stirring the entire time.


Then you beat your egg yolks (save the whites because you can make an angel food cake with them!!) Temper your egg yolks by adding a little bit of the slurry to the yolks slowly to bring everything up to the same temperature.  The recipe says to add about half of the mixture to the eggs, I didn't do that.  Just add enough to make sure your eggs aren't going to scramble. The mixture will turn a lovely shade of yellow!


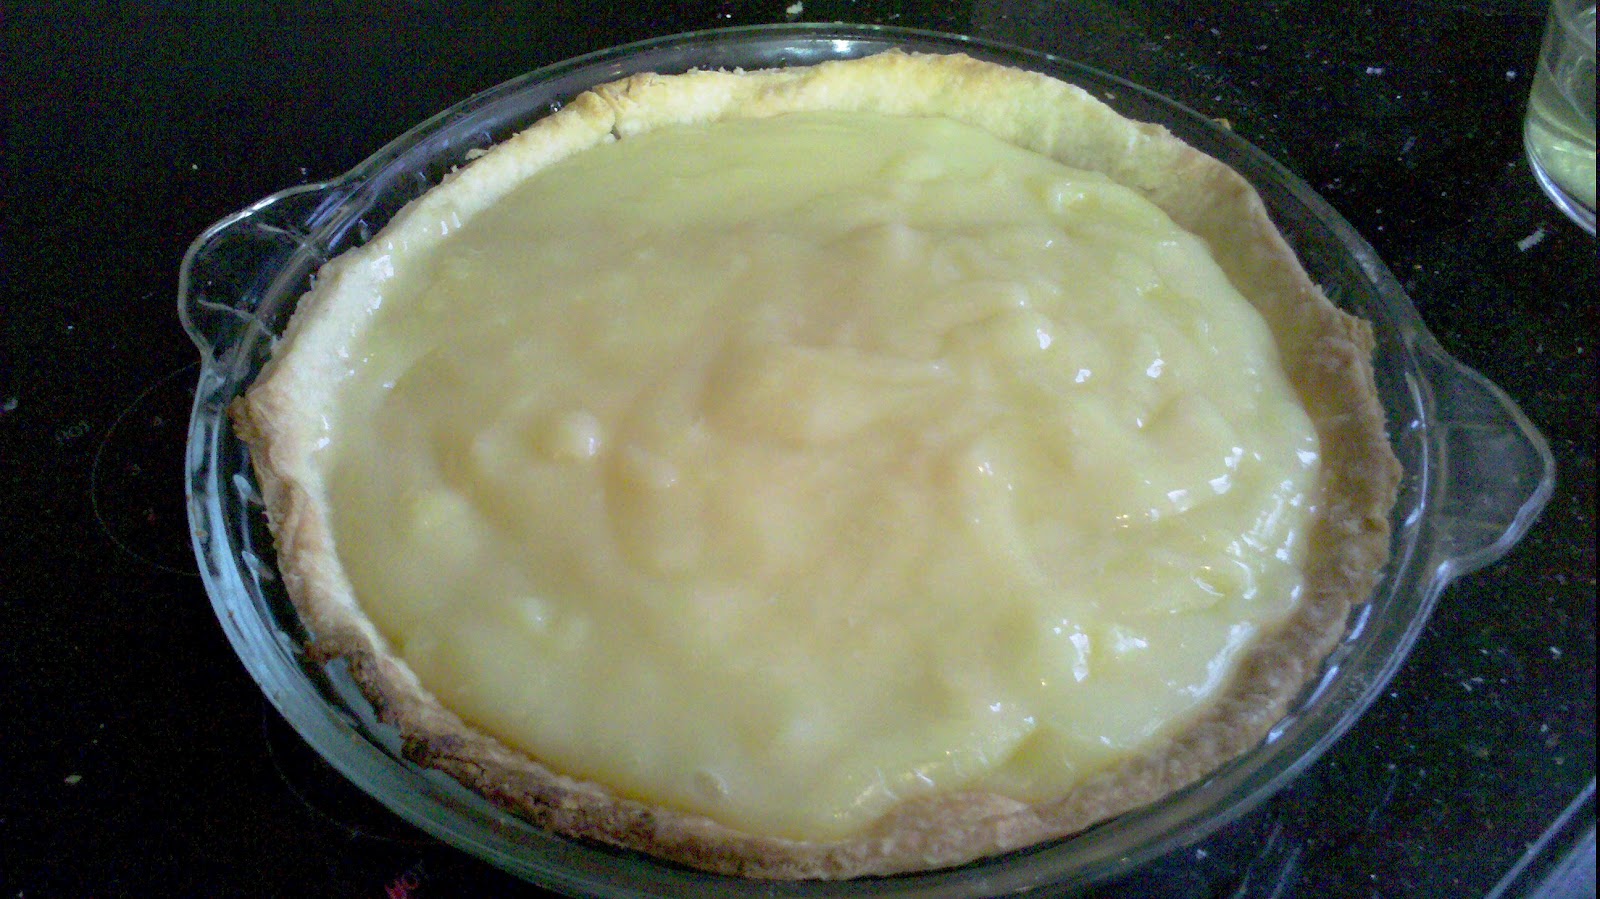
After you've added the eggs, you can add your lemon zest and juice.  Whisk away! Then once it has boiled, bring it off the heat, add your butter, mix it in so it melts and let stand for ten minutes. After it has cooled, add your mixture to your pre-cooked pie shell.  I was feeling adventurous yesterday so I made my own! Simply Recipes offers some great advice on making crusts, check it out!


Then you stick the lemony goodness in the fridge for two hours, pull it out and put strawberries on top.  The recipe calls for three cups, but I didn't have that many so I just lined the outside! :)


Put it back in the fridge for another two hours (Oh the waiting game!!!).  Then slice it up and enjoy the little tart! :) 


Friday, 20 April 2012

A slice of summer: Strawberry Pie

The weather has been amazing here in Toronto and I've been in the mood for berries.  All sorts, blueberries, blackberries, strawberries, raspberries, you get the idea.  I love them and the warm weather has really been pushing me into summer mode.

I saw a great post on Pinterest ages ago for Strawberry pie: it looked amazing! But when I went to get the recipe today, the site was asking for money to view the site...meep! So I went on a hunt for a new recipe.

I found this recipe called Makeover Grandma's Strawberry Pie on TasteofHome and it looked great! It just so happened that I was talking with my dear friend Cassie and she is a fantastic baker (and cook!).  She made this ahhhhmazing pumpkin pie for Thanksgiving and I ate more than I wish to admit. Anyway, Cassie has made a strawberry pie before and I mentioned to her that I was going to make one. She gave me some great advice: COOK EVERYTHING SLOW AND LOW! It's true. Make sure when you are cooking to have patience, the end result will be well worth it.

So, the recipe doesn't have any photos and I am a visual person, so, here we go!

It's a pretty simple recipe and doesn't call for too much! The only thing missing from this photo is the pie shell.  I cheated and had a frozen one! You need to pre-cook the pies shell so it can cool before putting in the lovely strawberry mixture.


So first off, mix the sugar and the corn starch in the pan.  Make sure you mix it all together before adding the water.  The water needs to be cold (so the corn starch doesn't clump).  Add the water in slowly and and keep on whisking.  It will look a bit like watered down milk, but keep on whisking with your heat on low!


Eventually the mixture will start to thicken up and clear up.  Let it boil (while stirring your little heart out: it's a great workout for your arm muscles!!!).  Remember Cassie's advice and keep the heat low!  It'll be a thick consistency.


After it has boiled for about two minutes, take it off the heat and add the gel.  This is where I got a little crazy and added about 1tbs of homemade strawberry jam (from my cousin Heidi, so tasty!) for a little extra strawberry taste.  Just mix it all in until of the gelatin is dissolved and it will turn a lovely red colour.

So while you are waiting for the gelatin mixture to cool (15 minutes), slice up your berries. I used two containers (including the few I ate.  They were just too tempting not to eat!)  Once you've let your gelatin cool, pour it over the berries and make sure everything is nicely coated. 


After it's all coated, add it your lovely little pie shell. And then the waiting game begins.  You have to wait for FOUR HOURS for everything to set.


But me oh my is it worth the wait....It is amazing and tastes just like summer should.  Add a little homemade whipped cream on top and be prepared to fall in love.


Saturday, 24 March 2012

Soda Cake

I love love LOVE sweets and put that together with my desire to bake...well, needless to say I'm surprised I don't weigh 1,000lbs.  I like to find ways to have my cake and eat it too without it going to my thighs!! I've made this recipe on several different occasions and it still amazes me how easy and tasty it is.

My Saturday night was spent with this handsome little fellow (the Mister was being ultra Canadian and watching Hockey...eh!)  A piece of guilt free chocolate cake and a little scoop of fro-yo!


All you need is a cake mix and a can of soda! That's it, I swear!!! In this recipe I've used Diet Pepsi, but I've made "Yellow" cake before with Ginger Ale or 7up! I would like to try Chocolate cake with cherry Pepsi. Oh...you could do Vanilla and Orange Soda for a Creamsicle cake...with a nice orange glaze...Or maybe a root beer float cake...mmmm

Back to the cake at hand: Chocolate-Diet Pepsi :) So as I said earlier...all you need is a can of soda and the cake mix! Make sure you pre-heat the oven to the specified temperature on the box (should be around 350 C)


Add the soda to the mix (in the bowl, of course).  It will be fizzy, which is pretty cool, but just keep on stirring and it will mix right in.


Choose your pan, oil said pan and pour it on in! It took me less time to mix everything together, grease the pan and pour it in than it did for the oven to heat up! That's how quick this is!!!


Put the little guy in the oven and make sure you watch it: it will take less time than specified on the back of the box.  This bunt cake usually says it takes around 40-45 minutes...it took 30 minutes with the soda.  So, make sure you watch it.   Burning a dessert should be considered a crime ;) Also, the top will won't 'spring back' like a normal cake does, so you're going to want to stick a knife in it and make sure it comes out clean.


Here is the sweet thing out of the pan, up close and personal! The texture is a little different than the traditional cake, but me-oh-my so good.  I sprinkled a little powdered sugar on it and called it a day.  Give it a try and let me know what combinations you come up with!!


Let your imagination run wild-it will be a tasty experiment!

Saturday, 17 March 2012

Let's get this party started!

Well, first post!! I've decided to start this blog because I'm currently in limbo with finishing up grad school, while waiting for PR status in Canada (woo immigration!) and needed to fill my time!  My dear friend Sara (http://beautifullycontained.blogspot.com/) has an AMAZING blog and I've been inspired to follow in her fashion and start blogging! :)

I've decided to make this a mishmash of standard life happenings, craft projects, baking and everything in between! I hope you enjoy, heaven knows I will! :)